Table des matières
I. Préparation préliminaire à la fabrication d'un miroir à diodes électroluminescentes : Correspondance précise entre les besoins et les matériaux
Une bonne préparation est la base de la réalisation d'un miroir LED pratique et beau. Au début, j'ai souffert d'une “préparation insuffisante”. La première fois que j'ai acheté une bande lumineuse, je n'ai pas calculé correctement la puissance, de sorte que l'alimentation n'a pas pu la supporter et que la bande a surchauffé au bout d'une demi-heure. Lors du choix du miroir, j'ai acheté du verre ordinaire bon marché et je n'ai réalisé qu'après le montage que l'arrière n'était pas plat, ce qui rendait difficile la fixation de la réglette lumineuse.N'oubliez donc pas que dans l'ensemble du processus de fabrication d'un miroir LED, la préparation préliminaire est essentielle. “exigences claires + compatibilité des matériaux”.”(1) Clarifiez vos besoins d'utilisation
Avant de commencer, posez-vous trois questions :- Où ce miroir sera-t-il utilisé ? Salle de bains, meuble-lavabo ou entrée ? Les exigences en matière d'étanchéité, de luminosité et de taille varient d'un endroit à l'autre. Par exemple, une salle de bain a besoin d'une bande lumineuse avec un indice d'étanchéité IP65 ou supérieur, tandis qu'un meuble-lavabo peut nécessiter une température de couleur réglable.
- Quelles sont les fonctions souhaitées ? Une version de base ne nécessite qu'une bande lumineuse constante ; une version avancée peut inclure un interrupteur tactile, un contrôle par APP mobile ou même un haut-parleur Bluetooth intégré. (J'ai finalement ajouté un variateur tactile - c'est super pratique de passer à une lumière chaude lorsque l'on se lève la nuit).
- Quel est votre budget ? Une version de base peut être réalisée dans un délai de 500 RMB, tandis qu'une version plus élaborée peut dépasser 1 000 RMB.
Par exemple, mon miroir était destiné à un meuble de chambre à coucher, et mes exigences étaient donc les suivantes :
- Taille 60cm × 80cm (s'adaptant parfaitement à l'espace mural réservé)
- Lumière blanche chaude (environ 4000K, pas de dominante de couleur pour le maquillage)
- Gradation tactile (trois niveaux de luminosité)
- Câblage caché à l'arrière (pour garder la surface du miroir propre)
Vous pouvez noter vos propres exigences sur une feuille de papier afin de ne pas vous égarer lors de la sélection ultérieure des matériaux.
(2) Liste des matériaux et conseils de sélection
Dans l'ensemble du processus de fabrication d'un miroir LED, le choix des bons matériaux peut réduire la difficulté de moitié. J'ai organisé les matériaux essentiels et optionnels, ainsi que des conseils de sélection :
1. Matériaux de base
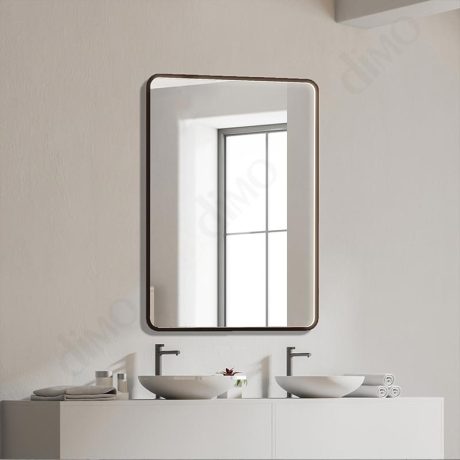
- Miroir: Préférer le “miroir argenté” (haute réflectivité, image claire). L'épaisseur doit être de 5 mm ou plus (trop fine, elle se fissure facilement). Le dos doit être plat (pour faciliter la fixation de la bande lumineuse). Si vous avez besoin d'une taille personnalisée, allez chez un verrier local pour la découpe - c'est moins cher que les achats en ligne et vous pouvez vérifier la planéité sur place. J'ai choisi un miroir argenté de 60×80×5mm pour 80 RMB.
- Bande lumineuse LED: Concentrez-vous sur trois paramètres : la température de couleur (blanc chaud 2700-4000K, blanc froid 5000-6500K), la luminosité (lumens par mètre ; 300-500 lm/m recommandés pour le maquillage) et l'étanchéité (IP65 pour les salles de bains, IP20 pour les zones sèches). J'ai choisi une bande SMD5050 blanc chaud 4000K avec 480 lm/m et un indice IP20 (12W par mètre, 5 mètres au total - exactement assez pour faire le tour du miroir une fois).
- Alimentation électrique: Il doit s'agir d'une alimentation à “tension constante” correspondant à la tension de la rampe d'éclairage (généralement 12V ou 24V ; j'ai choisi 12V). Puissance = puissance totale de la rampe d'éclairage × 1,2 (avec marge). Ma réglette faisait 5m × 12W = 60W, j'ai donc choisi un bloc d'alimentation de 72W (12V/6A).
- Contrôleur: La version de base utilise un “interrupteur à gradation” (gradation à 3 niveaux ou en continu) ; la version intelligente utilise un “contrôleur Bluetooth” (contrôle par APP de la luminosité/température de couleur). J'ai choisi un variateur tactile avec fonction mémoire (conserve le dernier réglage de luminosité après une coupure de courant).
2. Matériaux auxiliaires
- Adhésif: Utilisez le ruban adhésif 3M VHB pour fixer la bande lumineuse (étanche, résistant à la chaleur, ne laissant pas de résidus). Utiliser de la colle de construction pour fixer le miroir au panneau arrière (bonne capacité de charge).
- Panneau arrière: Pour recouvrir le câblage, il est possible d'utiliser des panneaux de densité (bon marché), des panneaux acryliques (translucides, parfaits pour l'éclairage latéral) ou des panneaux en aluminium-plastique (étanches). J'ai utilisé un panneau de densité de 3 mm (recouvert d'un vernis transparent pour le protéger de l'humidité).
- Fils/Terminaux: Utilisez du fil de cuivre flexible de 1 mm² pour connecter la rampe d'éclairage et l'alimentation électrique ; utilisez des bornes pressées à froid pour les connexions (évite les courts-circuits).
- Outils: Perceuse électrique (pour les trous de fixation), pistolet thermique (pour que l'adhésif adhère mieux), multimètre (pour mesurer la tension/le courant), couteau utilitaire (pour couper la bande lumineuse).
II. Principales étapes de la méthode de fabrication des miroirs à DEL : Contrôle détaillé de la conception à l'assemblage
Une fois que les matériaux sont prêts, passez au processus de fabrication proprement dit. C'est à ce stade que les erreurs sont les plus faciles à commettre. La première fois que je l'ai fait, la bande lumineuse était de travers et j'ai dû la refaire trois fois ; j'ai également inversé le circuit et j'ai failli faire griller l'alimentation.Rappel : dans l'ensemble du processus de fabrication des miroirs LED, le cœur est “suivre les étapes + faire attention aux détails”.” Ne vous précipitez pas - un travail lent et régulier donne de bons résultats.
(1) Étape 1 : Conception de l'agencement du miroir et de la bande lumineuse
La disposition détermine l'effet final. Je recommande de commencer par dessiner un “schéma miroir” sur papier (retournez le miroir et imaginez la disposition du dos) :
- Mesurez la largeur du bord du miroir : Mon miroir avait un bord de 2 cm (distance entre la surface du miroir et le bord extérieur). La bande lumineuse doit être fixée du côté intérieur, la largeur de la bande doit donc être ≤2cm (ma bande mesurait 1,2cm de large - parfait).
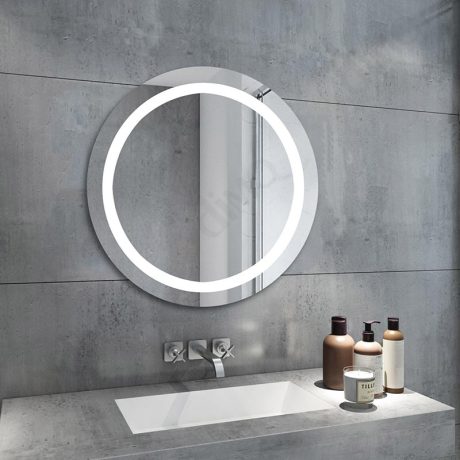
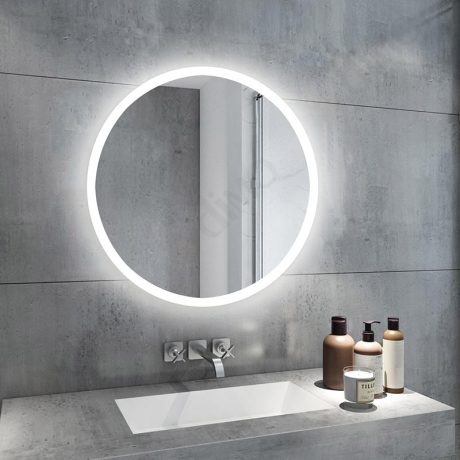
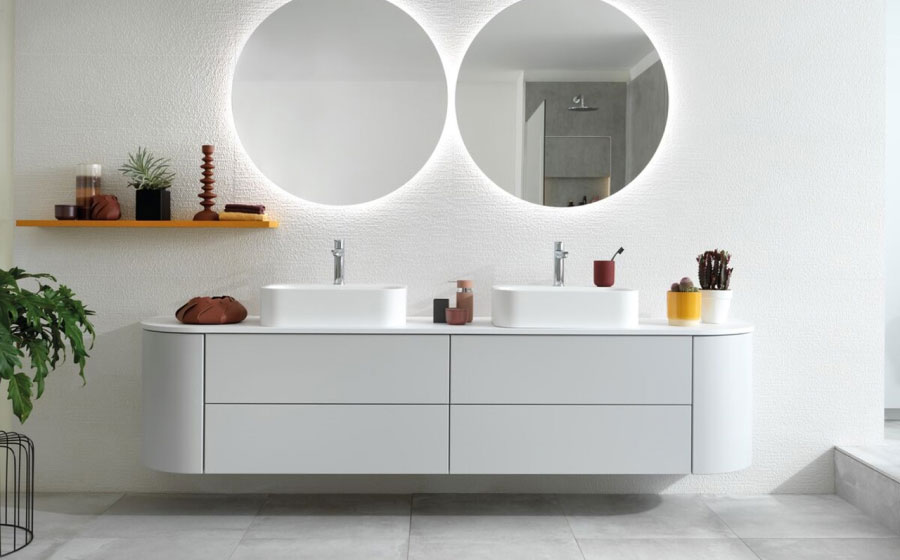
- Déterminer la trajectoire de la bande lumineuse : Il existe des options de type “entourage complet” et “simple face/double face”. Pour un miroir de courtoisie, un entourage complet est recommandé (éclairage uniforme) ; pour un miroir d'entrée, un seul côté permet d'économiser de l'argent. J'ai opté pour un entourage complet : en partant du côté droit du bord inférieur, en allant vers la gauche → le haut → la droite, et en revenant vers le côté droit du bord inférieur (en laissant les extrémités des fils pour le branchement électrique).
- Marquez la position de la bande lumineuse : Utilisez du ruban adhésif au dos du miroir pour tracer le chemin (1,2 cm de large). Assurez-vous que la longueur de chaque segment est exacte. Le périmètre de mon miroir était de (60+80)×2 = 280 cm. Avec 5 m (500 cm) de bande lumineuse, je disposais de 220 cm supplémentaires pour les ajustements.
(2) Étape 2 : Construction des circuits et essais de sécurité
Le circuit est le “cœur” du miroir LED. Un mauvais fil peut brûler la bande lumineuse ou même provoquer un court-circuit. J'ai résumé la “méthode des trois contrôles” pour cette étape :- Vérifier les connexions de la bande lumineuse : Les bandes LED sont connectées en parallèle (chaque compteur a des pôles positifs et négatifs indépendants). Coupez uniquement le long des “lignes de coupe” (marquées par des symboles de ciseaux au dos). Sinon, vous brûlerez les DEL. J'ai coupé la bande de 5 m avec un couteau utilitaire le long des lignes de coupe, puis j'ai connecté chaque segment avec des bornes (rouge pour le positif, noir pour le négatif - ne pas les inverser !).
- Vérifier l'adéquation de l'alimentation : connecter la bande lumineuse à l'alimentation et utiliser un multimètre pour mesurer la tension de sortie (mon alimentation avait une tension nominale de 12V, la tension réelle était de 11,8V - normal). Mettez ensuite la bande sous tension pour la tester. Si une section ne s'allume pas, il se peut que la borne ne soit pas assez serrée. Si rien ne s'allume, vérifiez l'interrupteur ou l'inversion du câblage. La première fois que j'ai inversé le positif et le négatif, la bande a clignoté deux fois et s'est éteinte - j'ai rapidement coupé le courant et rebranché.
- Vérifier l'installation du contrôleur : L'interrupteur tactile doit être monté sur le côté du miroir (facile à utiliser). Percez un trou de 1 cm pour les fils, puis fixez le panneau de l'interrupteur avec de l'adhésif. Pour un contrôleur Bluetooth, connectez-le à l'alimentation et à la bande lumineuse, et appairez-le d'abord avec votre téléphone. (J'ai défini trois niveaux de luminosité dans l'APP : 50% lumière chaude, 80% lumière blanche, 10% lumière de nuit).
(3) Étape 3 : Assemblage et fixation du miroir et du panneau arrière
Cette étape permet de déterminer si le miroir est stable et si le câblage est correctement dissimulé. J'ai utilisé une “structure sandwich” : panneau arrière (pour couvrir le câblage) + bande lumineuse (fixée sur le panneau arrière) + miroir (couvrant la bande lumineuse).- Fixez la bande lumineuse au panneau arrière : Appliquez du ruban adhésif 3M aux emplacements correspondants sur le panneau arrière (chauffez-le avec un pistolet thermique pendant 30 secondes pour une meilleure adhérence), puis fixez la bande lumineuse conformément au schéma de disposition (appuyez fermement lors de la fixation pour éviter les bulles). Lorsque j'ai atteint le bord supérieur, la bande était un peu lâche, j'ai donc ajouté de petits colliers de serrage à deux endroits. Elle est restée en place pendant six mois.
- Collez le miroir sur le panneau arrière : Appliquez de la colle de construction sur les bords du panneau arrière (un point tous les 10 cm pour éviter tout débordement), puis alignez le miroir et appuyez fermement dessus (veillez à ce que la bande lumineuse soit alignée avec le bord du miroir !) Fixer avec du ruban adhésif pendant 24 heures (jusqu'à ce que l'adhésif durcisse complètement). J'ai été trop impatiente la première fois et j'ai enlevé le ruban adhésif après seulement 4 heures - les coins se sont soulevés, j'ai donc dû le refaire.
- Cachez le câblage : Faites passer les fils par les trous situés sur le côté du panneau arrière (entourez les extrémités de ruban adhésif). L'alimentation et le contrôleur peuvent être installés dans un renfoncement du mur au-dessus du miroir (j'ai creusé une petite fente et l'ai recouverte d'une plaque décorative - cela ressemble à une installation encastrée).
III. Débogage et optimisation de la méthode de fabrication des miroirs à diodes électroluminescentes : Passer de “utilisable” à “génial”
Après l'assemblage, ne vous précipitez pas pour terminer. Le débogage et l'optimisation peuvent résoudre 90% de petits problèmes. Après ma première construction, il y avait des zones sombres sur les bords ; j'ai ajusté la luminosité trois fois avant qu'elle ne devienne uniforme. L'interrupteur tactile tombait parfois en panne à cause d'un mauvais contact avec le fil. Dans l'ensemble du processus de fabrication d'un miroir LED, le débogage est la “touche finale”.”(1) Débogage de base : Luminosité et uniformité
Après la mise sous tension, vérifiez trois choses :- La luminosité est-elle appropriée ? Pour le maquillage, le centre du miroir doit avoir une luminosité de 300 à 500 lux (utilisez l'application luxmètre de votre téléphone). Le mien mesurait 420 lux - parfait. Si la luminosité est trop faible, il se peut que la puissance de la rampe d'éclairage soit insuffisante. Si la luminosité est trop forte, diminuez-la à l'aide du contrôleur.
- La lumière est-elle uniforme ? Placez-vous devant le miroir et vérifiez s'il y a des “zones sombres” ou des “points chauds” le long des bords. Les zones sombres signifient généralement que la bande est de travers (mon bord supérieur était décalé vers l'extérieur, ce qui rendait le haut du miroir plus sombre ; un réajustement a permis d'y remédier). Les points chauds apparaissent lorsque l'espacement des LED est trop important (les SMD5050 avec un espacement de 6 mm sont plus uniformes que les 3528).
- La température de couleur est-elle confortable ? Le blanc chaud (4000K) est idéal pour le maquillage (pas de dominante de couleur). Le blanc froid (6000K) est idéal pour se raser ou vérifier les détails du maquillage. J'ai réglé le “mode maquillage” (4000K/80% de luminosité) et le “mode propre” (6000K/100% de luminosité) sur le contrôleur Bluetooth - c'est très pratique de passer d'un mode à l'autre.
(2) Optimisation fonctionnelle : Résolution de problèmes courants
Si vous rencontrez ces problèmes, essayez mes solutions :- Surchauffe de la rampe d'éclairage: Vérifier si l'alimentation n'est pas trop petite (ma réglette de 60W avec une alimentation de 72W fonctionne à température normale). Evitez également de fixer la barrette directement sur un panneau arrière métallique (bonne conduction de la chaleur mais risque de court-circuit). J'ai utilisé une carte de densité, en maintenant la température en dessous de 40°C.
- Défaillance de la commande tactile: Généralement dû à un mauvais contact des fils (resserrer les bornes) ou à un interrupteur trop proche de la bande lumineuse (interférences électromagnétiques). J'ai déplacé l'interrupteur tactile au milieu du bord inférieur, à 20 cm de la bande lumineuse - plus de problèmes.
- Embuage du miroir (utilisation dans la salle de bain): Fixer un film chauffant 12V à faible puissance sur le panneau arrière (partage l'alimentation avec la bande lumineuse). Après avoir installé ce film dans ma salle de bain, le miroir ne s'est plus jamais embué pendant les douches.
IV. Résumé de la méthode de fabrication des miroirs LED : Le plaisir de la fabrication dépasse de loin le résultat
Du premier “laissez-moi essayer” au dernier “c'est incroyable”, la plus grande leçon à tirer de ces trois mois est la suivante : il n'est pas difficile de faire quelque chose soi-même à cause de la technologie, mais parce qu'on a le courage de le faire : Faire quelque chose soi-même n'est pas difficile à cause de la technologie, mais parce qu'il faut avoir le courage de le faire. commencer.Lorsque vous vous tenez devant le miroir LED que vous avez fabriqué et que vous regardez la lumière changer d'un simple effleurement du doigt, le sentiment d'accomplissement - “J'ai créé cela” - ne peut être acheté avec aucun produit prêt à l'emploi.Vous vous sentez un peu tenté ? Ne vous précipitez pas pour acheter du matériel. Prenez d'abord une feuille de papier et notez vos besoins - taille, fonctions, budget - puis suivez une à une les étapes que j'ai partagées. Si vous rencontrez des difficultés, n'hésitez pas à laisser un commentaire et je vous aiderai (par exemple, quelle marque de bande lumineuse choisir ou comment rendre le câblage plus sûr).N'oubliez pas : dans toute la méthode de fabrication des miroirs LED, il n'y a pas de “parfait” - seulement “ce qui vous convient le mieux”.”Allez-y, commencez. Le prochain miroir LED qui vous satisfera vraiment attend que vous le créiez.